Leather can be restored in 2 ways:
- Method A:Using the Leather Recolouring Balm. This is a simple wipe on and buff off application, however it requires the leather's surface to be absorbent in order for the balm to properly penetrate. It also works if the surface coating has split/cracked exposing a lighter colour beneath. The advantages of using the balm are that it is cheap and easy to use, and the results are very pleasing. However, it only restores the colour, if the leather is cracked, it will not actually fix the cracks - just hide them with colour. See the video above to see what you can expect.
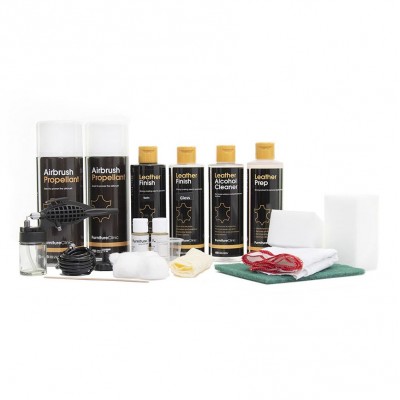
- Method B: Using the Leather Colourant Kit. If the damaged area is not absorbent or the cracks are darker than the leather, then you'll need to restore it using the Leather Colourant Kit.
For a full list of our products used for restoring leather, please visit our Leather Restoration section.
METHOD B: Using the Leather Colourant Kit
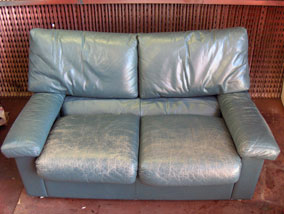
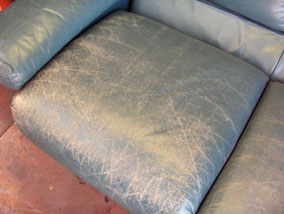
In this guide we will restore the two seater sofa shown in the photo on the left.
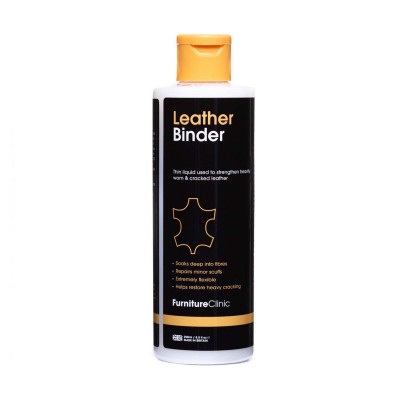
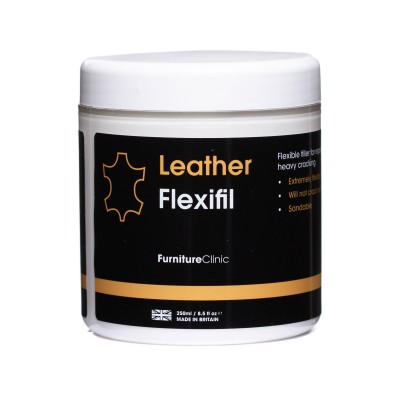
The leather is heavily cracked and so we will be using Leather Binder, Flexifil and the Leather Colourant Kit to carry out the restoration.
If the leather had little or no cracking, you would not require Flexifil, in this case, skip the section of the guide on filling cracks.
All of the products mentioned in this guide can be purchased from this guide page, or on the relevant product pages on the site.
STEP 1: Prep the leather
The first step is preparing the leather ready for applications of colour. We do this to remove any waxes, oils or silicones that may be present on the leather, not removing these could cause adhesion problems. Prepping the leather also removes the manufactured finish by Leather Prep. If the leather is very dirty, clean it first with the Leather Ultra Clean.
Different prepping techniques can be employed with similar results but we will show you the most thorough way in this guide and explain the reasons for doing so along the way
1. Do the back and sides first. A lot of furniture these days have cheaper leather (split hide) on the back and sides and using a strong cleaner like the Leather Prep would strip the colour off so we won't be using it on the sides. For the sides all you need to do is wipe them down with some Alcohol Cleaner on a cloth. Not prepping the back and sides as thoroughly as the rest of the leather won't affect the end results. This is because the back and sides aren't really used and so come under no, or very little stress.
2. Because the seating cushions and other areas come under more stress (wear & tear) it is important to prepare them. To do this it is best to rub them with the Leather Prep and an Abrasive Pad, this application removes the leather finish. However, because this leather is very badly worn, it is best to just wipe the leather down with the Leather Prep and a cloth. The Abrasive Pad would make the cracking even worse in this case.
The leather is correctly prepped when you start to see colour transfer from the leather onto the Abrasive Pad or cloth. This indicates that the finish has been removed exposing the colour beneath.
3. The above process will have removed the manufacturers finish and any silicones that are soluble in solvents. There are however some silicones like spray on polish and waxes that aren't soluble in solvents, and so to remove these we need to use the Alcohol Cleaner. After using the Leather Prep wipe the leather down with a cloth dampened in the Alcohol Cleaner and for ease of use you could also spray the Alcohol Cleaner directly onto the leather. Now wait 30 minutes for the prep to evaporate.
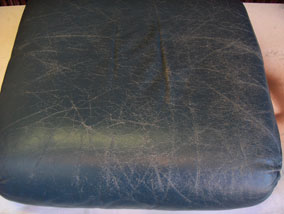
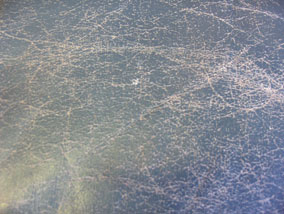
The above two photos show the seating cushion in very bad condition. The photo to the right is an up-close photo of a section of the cushion. The cracks have occurred through 20 years of wear and tear on the leathers surface causing the pigment to 'crack' as the leather flexes. Regular applications of Leather Protection Cream could have prevented this!
The process will be to fill the cracks and then colour the leather.
STEP 2: Strengthening the leather
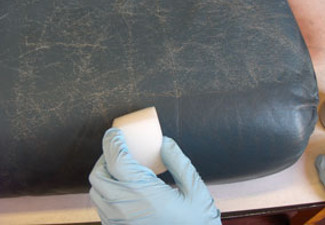
Strengthening the leather with Leather Binder. The Leather Binder is applied with a sponge and is absorbed by the leather holding all the worn leather fibres together. Apply approximately 3-5 coats to the entire surface, leaving time for each coat to dry before applying the next.
Note that it is important that excess binder that may build up around areas of stitching should be wiped away before it dries.
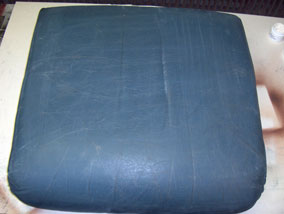
Note that the Binder will change the look of the leather slightly at this stage, in this example It may appear as though it has coloured the cracks. All it has done is darken them as they absorbed it. Do not think this has sorted the problem!
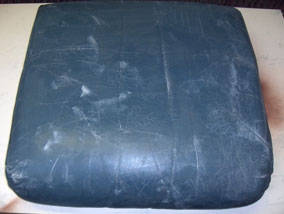
STEP 3: Applying the Flexifil
Applying the Flexifil (heavily cracked leather only). After the Leather Binder has strengthened the leather to prevent future cracking; Flexifil is used to repair existing cracking.
Note: It is not suitable for repairing damage such as holes, cat scratches, tears, cuts or burns. For areas that have suffered this kind of damage you require the Complete Leather Repair Kit .
To apply the Flexifil, simply take a palette knife or spatula and apply a small amount to any areas of cracking on the leather. Then, carefully run the edge of the palette knife over the filled area to smooth it out and remove any excess. Once all of the cracking has been filled, leave this to dry for 30 minutes and then take some fine sandpaper (1200) and smooth the area down.
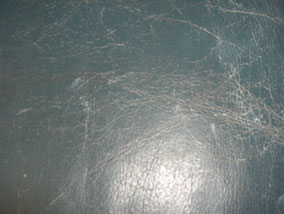
To the left is a photo showing a close up as before. This time you will notice where the Leather Binder has filled in some areas and the Flexifil others.
NOTE: It is fine to apply another coat of Binder on top of the Flexifil if necessary. Even if you apply colour and think it could be re-filled, it is ok to apply Flexifil on top of the colour. This helps to achieve a smooth finish.
STEP 4: Applying the Leather Colourant
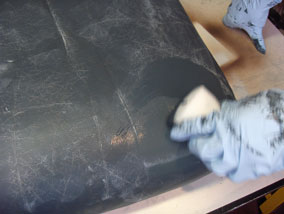
Shake the bottle of Leather Colourant for about 3 minutes to make sure it is well mixed. Pour a small amount onto a sponge and rub into the leather. The idea is to sponge on a thin coat of colour working it into any gaps, creases and hard to reach areas. Apply light pressure here to work the colourant into the grain. If you apply too much pressure you may get a foam of colour on the surface, this is not a problem, just wipe it away with the sponge (gently).
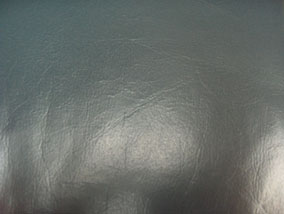
The image to the left is the before close up with a coat of colour sponged on.
The Leather Colourant dries naturally or you can speed it up with a hair dryer.
STEP 5: Spraying the Colour
Wait 30 minutes for the colourant to thoroughly dry and then proceed to spray the leather. Set up your spray gun or airbrush and then spray the leather at a comfortable distance, not to over apply the colour. It is best to practice a bit on a piece of paper to get the hang of spraying first. Spray the colourant on in thin layers. This avoids runs and so makes for a nicer finish.
Because the colourant we're using is water based it takes a few minutes to dry. We therefore advise you to spray one area and then dry it using a hair dryer. Doing it this way reduces the chance of runs. If you do see a run, just wipe it off with a cloth or sponge and then re-spray the area.
There is no right number of coats that should be applied to the leather. Spray on one coat and dry it off, then just keep spraying on a coat at a time until all the base colour is hidden.
STEP 6: Spraying the leather finish
The Leather Finish is applied in the exact same way as the Leather Colourant. Thin layers are the key!
The Leather Finish is the same finish that we removed at the start of the process. It’s applied by airbrush so it's important to ensure your airbrush is cleaned thoroughly after spraying the Leather Colourant.
The kit contains both Gloss and Matt versions of the Leather Finish, which can be mixed together at different ratios to achieve the right level of sheen for your leather. Here is a quick guide to achieving different sheens:
Gloss: 100% Gloss
Semi-Gloss: 75% Gloss and 25% Matt
Satin: 50% Gloss and 50% Matt (this is often used on leather furniture)
Semi-matt: 25% Gloss and 75% Matt (this is what you'd normally find on a car interior)
Matt: 100% Matt
It's important to thoroughly shake each bottle before opening.
Mix the finishes together to create the version that you're after, using the guide above as a reference. Once mixed, test the finish on an inconspicuous are to make sure you're happy with it. You can adjust it by adding more matt or gloss, as needed. If you're unsure what finish you want, start with Satin and adjust as required from there
Once you've found a mixture you’re happy with, it's time to add the Crosslinker Eco. This should be added at a ratio of roughly 1:8. For reference, add 15ml of Crosslinker Eco to 125ml of Finish.
The finish is applied exactly the same way as the colourant. When you spray the Leather Finish onto the leather, make sure it is dry before spraying on a second coat. Like the Leather Colourant, you can use a hairdryer to speed up this process.
Once the job is complete, wait 1 day before using the leather.
FINISHED WORK:
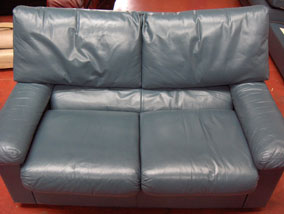
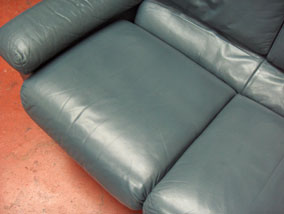
The above two images are of the seat thoroughly coloured. As standard the leather has a slight shine to it. This can be either increased using a gloss finish, matted down using a matt finish or kept the same using a satin finish. In this case we used a satin finish to match the original sheen.
We have a full range of products for leather restoration that includes leather dyes, leather repair products and leather colour restorers.


