


 Limited")
-
You have no items in your shopping cart.


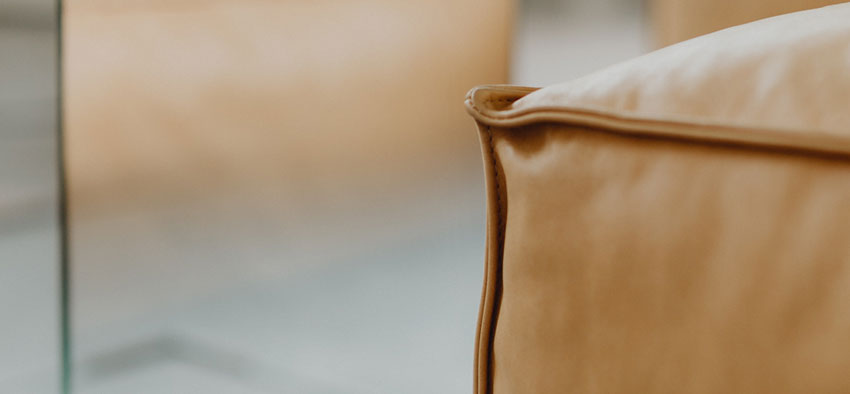
Have you ever noticed that sometimes when you apply the Leather Finish to a piece of leather, after restoring the colour, the sheen just does not look right compared to the original leather? it seems slightly too matt, or slightly too glossy, and no matter how much you try to tweak it, it never looks right; sometimes it may even look ‘plasticky’ in comparison!
Well, it may be that you are dealing with a ‘polished’ finish. This is where the tannery finishes the leather with a topcoat and then the surface of the leather is polished, often by means of a fine grit sandblasting method or large industrial polishing machine.
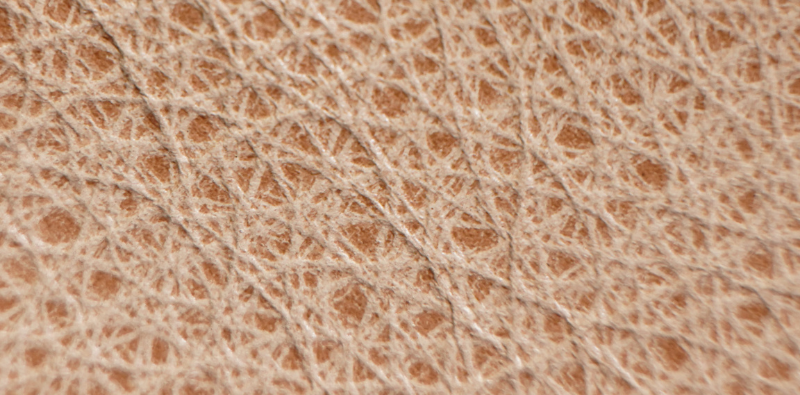
Whichever the method, when leather is subject to this polishing, the resulting effect is that the peaks of the grain of the leather are slightly shinier than the valleys of the grain, which look matt in comparison.
This effect simply breaks up the sheen of the finish on the leather giving it a naturally random mottling effect across the hide; this can give single coloured pigmented leather a subtle two-tone appearance and can indeed be mistaken for a two-tone pigmented leather.
When it comes to restoring this type of leather, it is not possible to mimic the method used in the first place; but it is possible to match the effect. We are going to use a method using two different sheens of Leather Finish. In fact, you can also use this method to obtain a specific two-tone colour effect where there is a slightly darker colour applied only to the peaks of the grain as can be seen in this picture:
To replicate this type of effect, it is easier for me to show you how to apply the colour first, before moving onto the polished finish effect.
I tend to use a large paintbrush to apply the colour when this effect is needed.
A very small amount of colour is needed for this method; apply colour to sponge.
Transfer colour from sponge to brush.
Get rid of excess product from brush by brushing a scrap piece of paper.
When very little colour is transferring from the brush, it’s time to apply it to the leather.
Very gently, feather the end of the brush onto the surface of the leather, the colour should be transferred only to the peaks of the leather.
You may need to apply several coats to build up the colour to achieve the desired effect.
As can be seen, once you have the right amount of colour transfer from the brush, it does not take long to colour the leather and achieve the desired effect.
The polished finish effect can be achieved in the same way; just using a glossy finish rather than Leather Colourant. Simply seal in the colour restoration/repair with a slightly matt finish using your normal 3-4 coats and then use a glossier finish to brush over the peaks.
You may need to adjust the matt finish to match the base shine of the leather (i.e. add some gloss to help it blend in).
Just one more thing to note here when you are using this technique with the Leather Finish; the Leather Finish is a little bit runnier than the colourant, so getting the correct amount of product transferring from the brush is the trickiest part; a natural bristled brush works best for this.
We have had some cold spells lately, so remember to check the temperature when applying our Leather Colourant and Leather Finish. Always make sure you stick to application conditions.
The following sentence has been taken from the technical data sheet of the Leather Finish:
‘The temperature of the substrate should be no less than 10°C and at least 3°C above the dew point of the air measured in the vicinity of the substrate. Good ventilation is required to ensure proper drying’.
What this sentence means, and why it is so important, is true of any water-based paint or coating. In any paint industry, if the temperature is too low, the paint will simply not adhere to the substrate (leather) properly.
The ‘3°C above the dew point’ phrase refers to the temperature to which air must be cooled to become saturated with water vapour with any further drop in temperature resulting in condensation. Or, to explain in simpler terms, if you can see your breath when painting leather, it is too cold!
If you are painting a wall, this does not matter as the paint is not likely to be disturbed; but when we paint leather, it is normally going to be sat on and used, rubbed and subject to wear and tear through normal use. If your coating has not adhered properly due to cold conditions during application, it will inevitably fail and start to peel.
We use cookies to make your experience better. Using our site means you agree to the use of cookies and similar technologies.