


 Limited")

Scuffs and scratches on leather car seats and leather furniture are an all too common problem that can leave an unsightly area of damage on an otherwise perfect piece of leather upholstery.
The good news is that using the guide and products shown on this page (all in one kit!), getting rid of scratches and scuffs on leather can be quick, easy and easy on the bank balance!
See the video guide above and the step by step guide below for details.
PRODUCTS REQUIRED
Complete Leather Repair Kit - To repair the damage to the leather
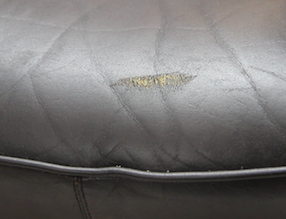
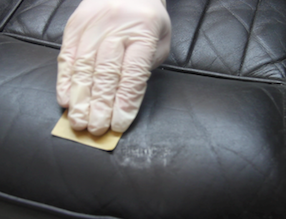
The leather seat shown to the left has suffered a nasty scuff/scratch, leaving an area of damage and colour loss.
Despite what is commonly thought, this is a relatively easy problem to fix. With a few simple to use products (available above!) and the steps provided below, scuffs and scratches no longer need to be a nightmare!
METHOD
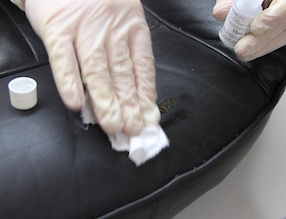
STEP 1. CLEAN THE AREA
As with all quality leather repairs and restorations, the first step is to ensure the area is free from dirt and contaminants.
To do this, take the Leather Prep Pad and wipe the area down thoroughly.
Once clean, leave the area to dry naturally for approximately 5-10 minutes.
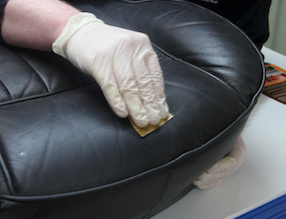
STEP 2. SAND ROUGH PATCHES
The scuff in the example shown was quite rough to the touch, in situations where the damaged area is rough such as this, it is always best to sand the rough areas down.
Simply take some 1200 grit sandpaper (included in the kit) and gently sand the area until it feels smooth to the touch. This ensures a more professional end result.
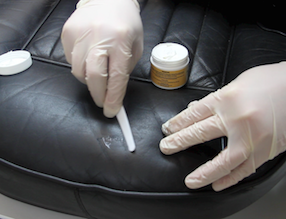
STEP 3. APPLY FILLER
Once the rough areas have been removed, areas of loss to the leather should be filled for the best possible result.
Take a small amount of Heavy Filler and smooth over the area of damage using the Spatula provided (Excess can simply be wiped away) and allow to dry (this should take 25-30 minutes naturally, this can be quickened with a hairdryer.
Build the filler up in thin layers as required, using this process, until it is level with the surface of the leather. This may take one coat, or several, depending on the severity of the damage. It is always important to leave enough time for the filler to dry completely at this stage, failing to do so will compromise the quality of the repair.
STEP 4. SAND FILLER LEVEL
Once the filler has dried sufficiently, the next step is to sand the filler level with the surface of the leather.
Take the 1200 grit sandpaper used previously and sand the applied filler to ensure that it sits completely level with the surface of the leather.
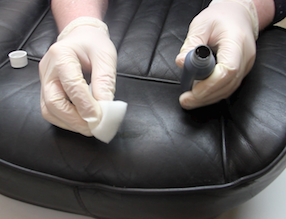
STEP 5. APPLY COLOURANT
The kit contains a quantity of colourant (selected on ordering) and several tints, along with a colour matching guide. Take the standard colourant and tint as needed, following the instructions, to get a perfect match for your leather. (Always test on an inconspicuous area when colour matching, until you get the required colour.)
Once a suitable match has been achieved, simply apply a small amount of the matched colourant to the area being repaired, ensuring the entire area is covered. After application, dry with a hairdryer.
Use the same method of application and drying to apply as many thin coats as required to completely cover the damage.
The Colourant in this Kit has built in sealers and so once applied the repair will becomes scuff and scratch resistant.

FINAL RESULT
As can be seen from the after image provided to the left; with a couple of easy to use products and a simple process, scuffs and scratches can be repaired quickly and with minimal cost.
Professional results are easy to achieve, even for a DIY novice! If you have a scuff or a scratch on your leather, purchase the products you need right here at a great price today!
