


 Limited")

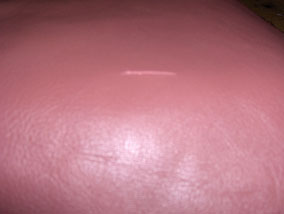
This photo shows a cut in a leather sofa. To fix the cut you will need the following product.
PRODUCTS REQUIRED
Complete Leather Repair Kit - This might be needed if the cut doesn't glue together neatly, exposing some of the damaged colour.
METHOD

STEP 1. OPEN THE CUT TO EXPOSE FIBRES
To repair a cut open the cut out by squeezing either side of it with your fingers. This exposes the leather fibres and will strengthen the repair when the glue is applied.
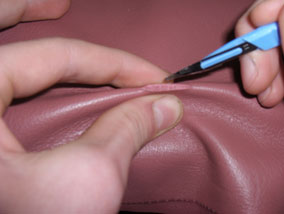
STEP 2. APPLY LEATHER GLUE
Dip your scalpel into the leather glue so there is a small amount of glue on the end. Then dab the cut with the scalpel length ways to apply the glue.
Once you have applied the glue release your grip and push either side of leather back together again. Then using the other end of the scalpel (rounded plastic side) gently press the cut down. Any excess glue can be wiped away with your fingers whilst it is still wet.
If the cut is visible on the surface, use the colour in the kit to disguise it.
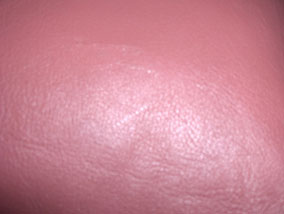
RESULTS!
Once the cut is fixed, use the colour matching guide in the Compete leather Repair Kit to fix a colour to camouflage the repair.
